
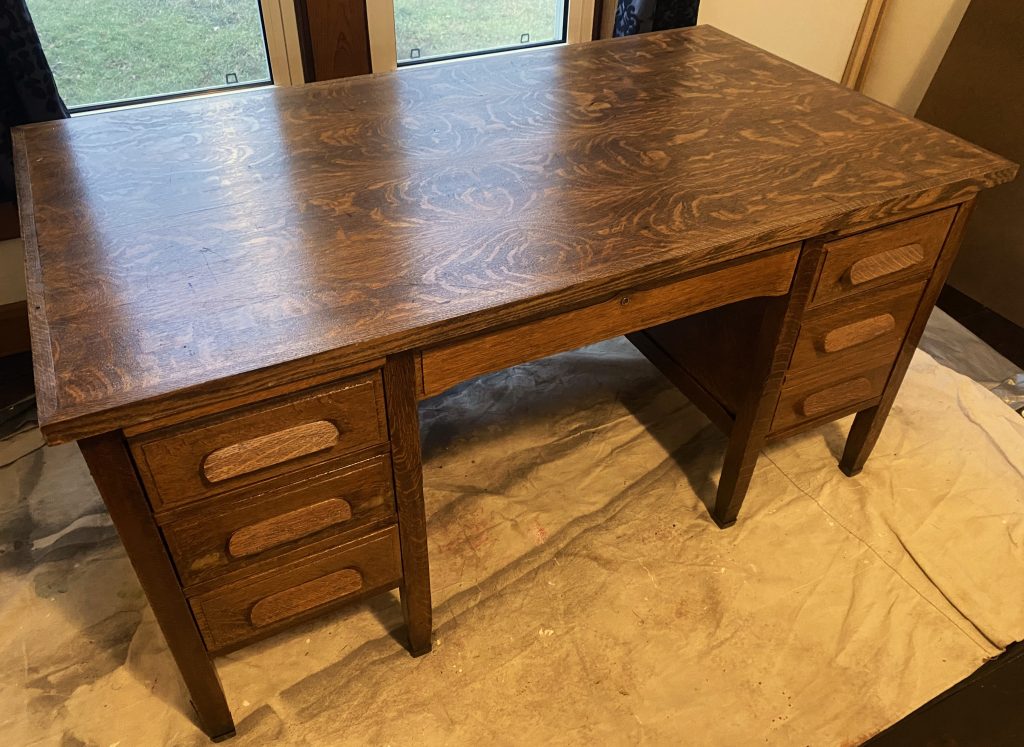
Learn how to transform an old piece of furniture, like this old school desk, and make it your own beautiful stained piece of furniture in your home!
The Story Behind This Old Desk
This was an old school desk that was recovered after a school fire. My Aunt has an eye for great pieces of furniture that may need some work to bring back to its former glory. She was able to nab this great piece up and had great intensions to restore it herself. Life happens and a couple moves later she was ready to give it to someone else that could possibly use it in their home. By this time she had already got it professionally stripped so I will not be showing that part of the restoration process. A truck load later and I had this desk hoisted into our old farmhouse waiting to be fixed back up.
How To Start From Scratch?
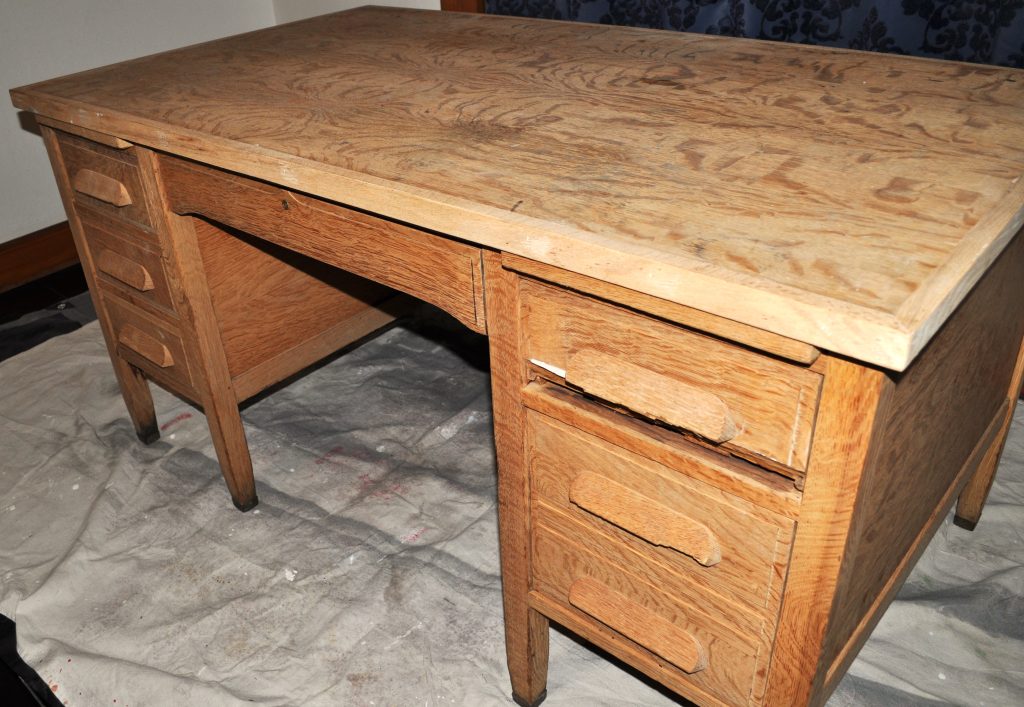
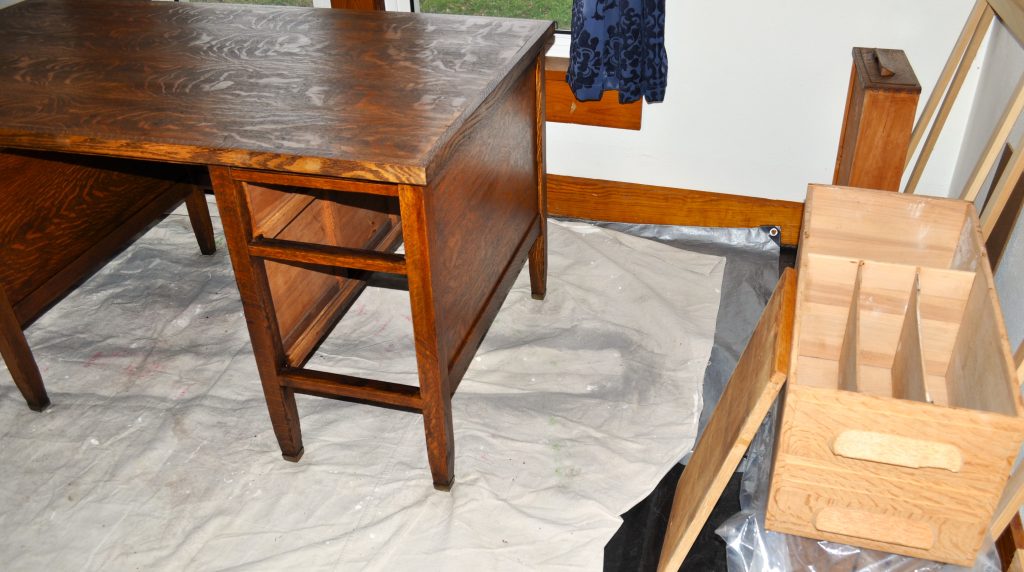
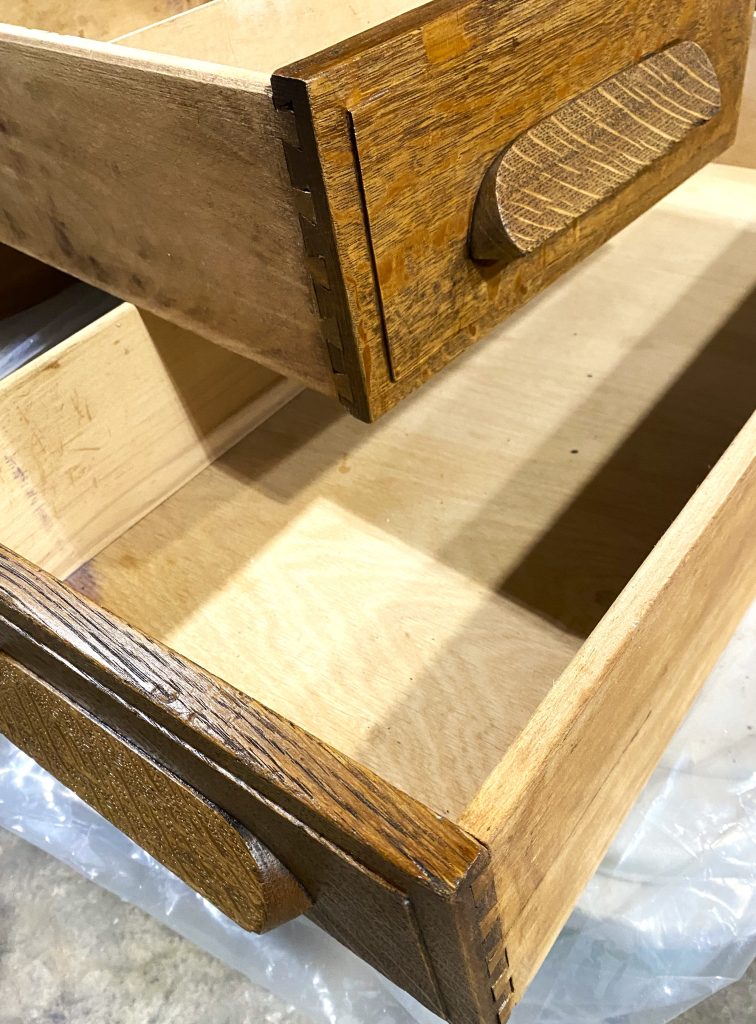
The photo above shows the condition that I received it. As you can see the right top drawer is badly damaged just under the wooden handle. The bottom portion was snapped off but fortunately the piece was saved as you will see later how I fixed it back into place. Both the top right drawer and the right middle drawer have handle damage which I show later in this post how I fixed them. Keep in mind I did this project for at no cost to me just my time because I already had left over materials and products from prior projects. I will add all the products and supplies I used below so you can see what you may need for a similar project for yourself.

Look at these Comparison Snap Shots
Take a look at the finished desk side by side with the unfinished desk. What an amazing difference!
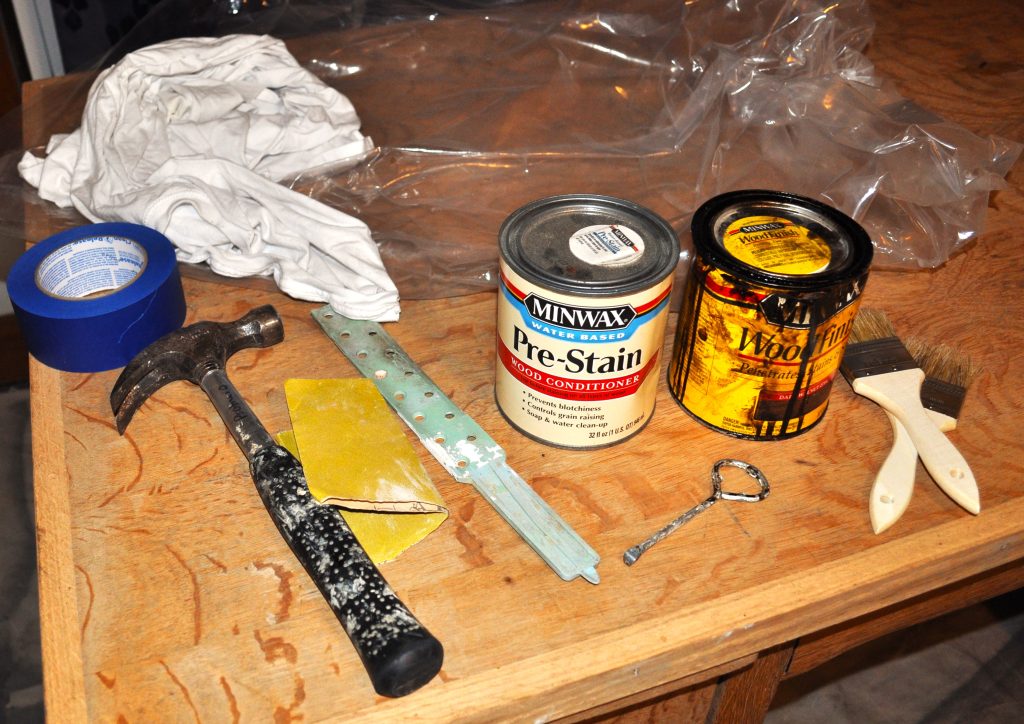
Now lets take a Sneak Peek at the Supplies:
- Drop Cloth
- Fine (120-220 grit) and Course (80-100 grit) Sandpaper
- Plastic sheets (I used large plastic bags left over from my meat order)
- Rags!
- Good paint brush
- Cheap set of paint brushes
- Foam brush
- Stir Sticks
- Grocery plastic bags
- Paint can opener
- Pre-Stain
- Stain
- Polyurethane
- Wood Putty/Wood Filler
- Wood Glue
- Painters tape
- Hammer
- Box Fan
- Shop Vacuum
- Paper towels
- 1 1/2″ Putty Knife
- Painters gloves
Before getting started we must first:
At any project there always seems to be work before the actual job, right? There are no exception here. First the sight must be a good space to do the job. I moved my dining room table aside to make room for the main frame of the desk. I laid down plastic tarp then a drop cloth for extra floor protection. The desk frame was set on the tarps.
How to Fix the Broken?
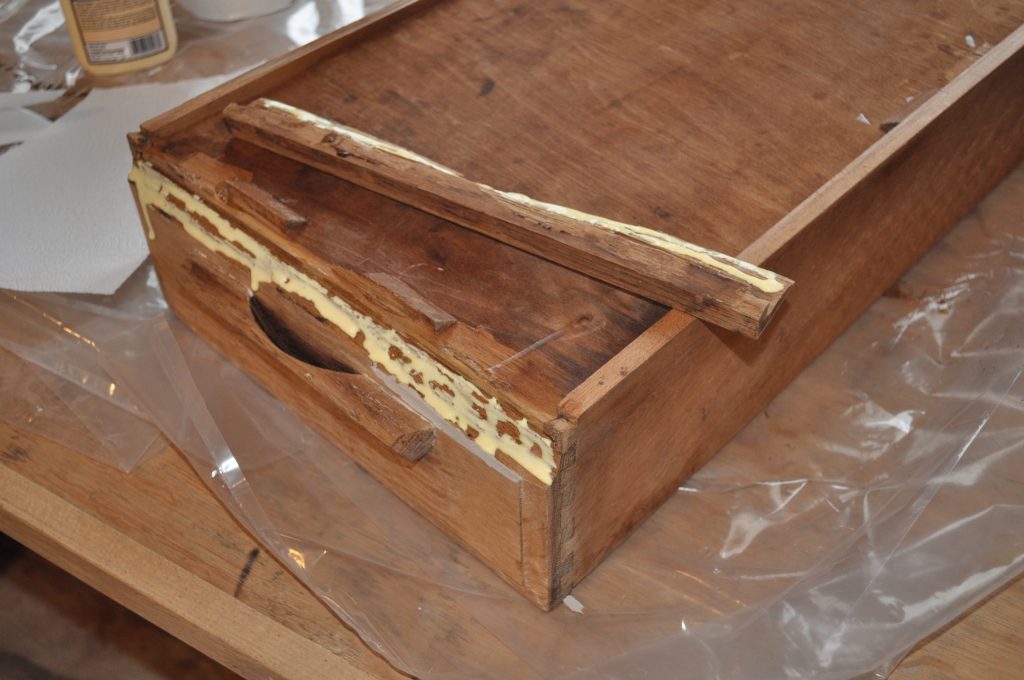
Before any staining, broken parts need to be fixed. Sand the broken areas carefully. Sand just well enough to rub off any rough edges. Clean with a dry paint brush or vacuum. Place some plastic down under the piece needing to be glued like I did (you will thank me later). Wood glue is great to mend two broken wooden parts such as my drawer here:
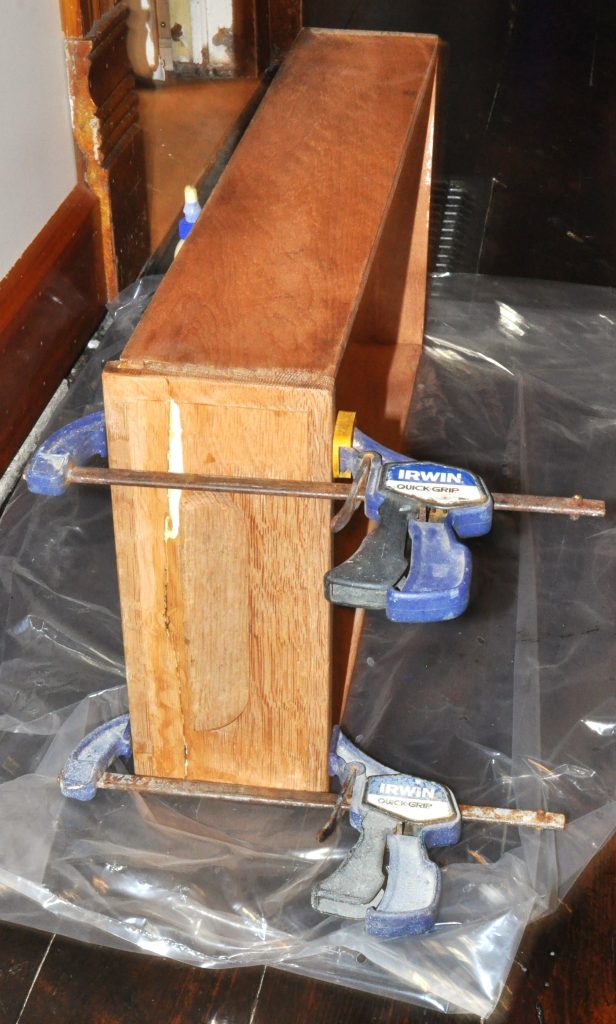
To hold all the broken pieces together I used clamps made for this type of job. Once clamped snuggly I set a box fan pointing directly onto the drawer to dry faster (parent-tip: faster is better when dealing with many people in your house like mine). This type of job needs to dry overnight. Don’t forget to wipe off the excess glue with a paper towel! After the glue is dry take some fine grit sandpaper and sand off any rough spots then wipe or vacuum sanded area.
What’s better than wood filler to fix imperfections in this job?
Wood filler is great to smooth out any bumps, cracks, holes, or seams. Sanding the seam down to smooth the two pieces is a good idea. Taking the putty knife, spread on the wood filler then use the flat part of the blade to gently smooth and scrap off excess filler. It is okay to leave some excess. Once dried, which will take hours so I advise waiting overnight, sand again and check if you like how if feels and fills the spots. If not quite filled, do it again. I did this wood filler part with some handles too. I used my fingers this time to apply and mold the filler on the handle sanding in-between applications.

Now for the Nitty Gritty Elbow Work
Using 120-220 grit sandpaper I sanded all parts. A shop vacuum comes in handy to cleanup all the dust off every piece. A quick wipe with a clean rag gets all the dust that is left behind. Next is the pre-wash chemical. Read all the directions on the pre-wash chemical you use before applying. Now use a clean paint brush, clean rag, or foam brush to apply the pre-wash. I used a foam brush for this part. Gently cover all parts with a thin layer of the pre-wash then wipe the excess off with a clean dry rag. Let the pre-wash dry per directions on the can.
Staining is Where the Magic Happens!
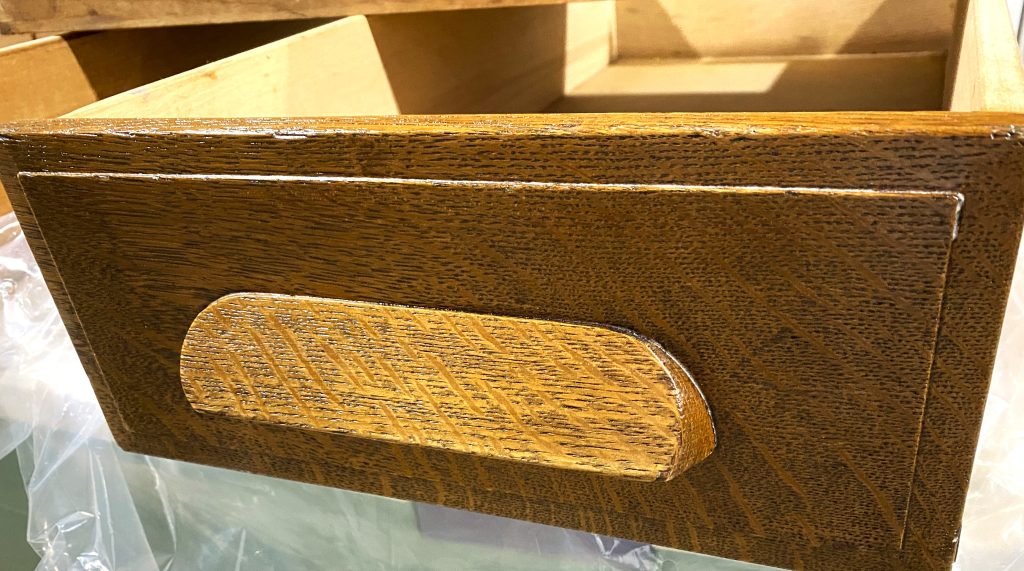
Now its time to get out the stain, brushes (I use the cheap kind), and clean dry rags. If you have never stained before test out a spot that is not most seen such as under something or on the back. Be sure to read your can before starting. Carefully brushing on the stain in one direction with the grain of the wood. My desk frame was so big I did the desk in sections. If you wait too long the stain starts to get gummy which makes it harder to wipe off the excess and can be a killer arm workout (from experience)! The rag should easily wipe over the wood not feeling grabby at all. I allowed my stained pieces to dry over night. I even turned my fan on them. Just look at the difference what staining can do in the picture below.
The Finished Look
A light sanding and wipe down before the first coat of polyurethane. With the poly I used a nicer 2inch paint brush and washed it with water after each application to keep in good condition. The brush strokes go with the grain of the wood in one direction with thin applications. Make sure there are no air bubbles and if there are just brush over again. I like to make sure I cover the section that I am doing such as the desk top then make one last long big strokes for the final touch before moving onto the next section. Check for drips on edges. Again read your poly can label. Mine said I needed to wait at least two hours before the next coat. A light sanding with 220 grit sandpaper and wipe down with a clean rag. I did the desk top three times and the rest twice. Inside the drawers I did one coat.

Tips:
- Wipe off the brush on the pre-stain, stain, poly can before transferring to wood. This will help with any drip disasters!
- Keep a clean dry rag handy for any drips or spills.
- Gentle sand in-between all coats with 220 grit sand paper.
- Before hammering lid on can place a rag over to prevent splatters.
- Of course do this kind of project in a well ventilated place away from kids, pets, bugs and dust.
- A box fan can help ventilate and dry the project faster.
Leave a Reply